A stylish smart home project in San Francisco demonstrates an elegant interface for home automation without proprietary parts.

This project is an elegant solution to a tricky problem with the affordable but useful 7-inch Raspberry Pi touchscreen. Peter Monaco’s mission was to create a touchscreen that sat flush to a wall as an interface for home automation without any ugly dangling wires and, as you can see, it has worked beautifully.
Your bezel frame came out really well. You’re obviously experienced with 3D printing – what printer do you use and do you have any advice for others wanting to replicate your project?
I’ve been 3D printing for a little over two years. I have a FlashForge Creator Pro, and use SketchUp for all my design work. I enjoy designing little household items that make life more efficient, like clips to hold the Christmas lights to the banister, a caddy to hold my Wi-Fi access point on the wall, or a clip to fix a broken watch band. For this project, I printed all the parts in PLA, which is my favorite material. These were some of the largest parts I’ve made in PLA, and I did have some problems with them curling at first. I was able to fix the curling by raising the print bed temperature to 50 degrees Celsius. Other settings included a print speed of 70 mm/s and nozzle temperature of 200 degrees Celsius.
The design has produced a sleek smart home touchscreen. What space-saving techniques did you need to employ?
This story is from the Issue 45 edition of Raspberry Pi.
Start your 7-day Magzter GOLD free trial to access thousands of curated premium stories, and 9,000+ magazines and newspapers.
Already a subscriber ? Sign In
This story is from the Issue 45 edition of Raspberry Pi.
Start your 7-day Magzter GOLD free trial to access thousands of curated premium stories, and 9,000+ magazines and newspapers.
Already a subscriber? Sign In
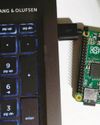
Access A Raspberry Pi Zero Using A Laptop
Configure OS settings and use the USB port to access both the command line and GUI from anothe computer
Draw Circuits With Paint
Assembling circuits has never been so easy with the joys of conductive paint, enabling you to bring together art and electronics in a whole new way.
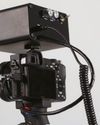
Picture Perfect Pi
Using a Pi to infuse AI into a camera and shock users into taking beautiful photographs
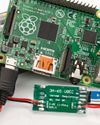
Add A Battery Pack To Your Raspberry Pi
Don’t leave your Raspberry Pi behind – incorporate it into mobile projects by powering it up using humble AA batteries

Print Wirelessly With Your Pi
Breathe new life into an old printer by using your Raspberry Pi as a wireless print server
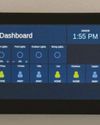
Open Source Smart Home Touchscreen
A stylish smart home project in San Francisco demonstrates an elegant interface for home automation without proprietary parts.

Kodak Pi Notification Lamp
Another mashup of retro and modern tech, this voice-activated Kodak lamp uses a Pi Zero W and Unicorn HAT.
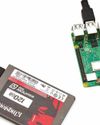
Boot Your Pi 3 B+ From USB
Configure and boot up your Raspberry Pi3B+ using a USB flash or hard drive
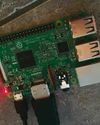
Create A Raspberry Pi Network With Piserver Tool
Use PiServer to easily set up a network of Pis connected to a central server, which you control.

Xbox Zero Arcade Pt 1
Let’s make a self-contained arcade machine out of old bits of kit, a spare Xbox pad and a Pi Zero!